
Text Mining with Python Part 1: Tokenization
Make more impact by analyzing your org's text data.

So many organizations still analyze free-form text data by hand. STOP! The process is costly, biased, and produces dubious insights.
Even in 2026, I still see clients using processes like this:
Capture text data from some process (e.g., surveys, chats, etc.).
Put the text data in a Microsoft Excel workbook.
Have a human periodically read the text, interpret it, and then label it.
The labels are then used to make business decisions.
Periodically, this onerous task is reassigned to another human.
Every human interprets the text differently.
Here’s the good news. Microsoft knows that free-form text exists in Excel workbooks in all manner of organizations around the world.
That’s why Microsoft added the libraries you need to mine free-form text data in a standardized, repeatable way, using Python in Excel.
And no, you don’t have to be a software engineer or data scientist to learn this stuff.
This tutorial series is designed for ANY professional to learn powerful techniques for extracting value from free-form text data.
Introducing Tokenization
Before free-form text can be analyzed by a computer (including AI tools like ChatGPT), it must be converted into a representation computers can understand.
This end-to-end process is often referred to as a pipeline.
Tokenization is the first step in a text pre-processing pipeline. Tokenization breaks a text into smaller, meaningful units called tokens. Tokens typically represent individual words or numbers.
However, tokens can also represent punctuation, symbols, emoticons (e.g., :-D), and emojis (e.g., 😁). Tokens can also represent entire paragraphs or sentences of a document.
Given the importance of tokenization to text mining, Microsoft has included the mighty Natural Language Toolkit (NLTK) library in Python in Excel. The NLTK provides you with a wealth of functionality for mining free-form text.
This tutorial series will use many of NLTK’s capabilities, but first, I will cover the basics.
BTW - While I’m using Python in Excel for this tutorial series, the code is 99% the same whether you’re using Microsoft Excel or a technology like Jupyter Notebook.
Basic Tokenization
The easiest way to understand tokenization is to see it in action.
So, here’s the simplest use case of tokenization I can think of: splitting free-form text into tokens using spaces.
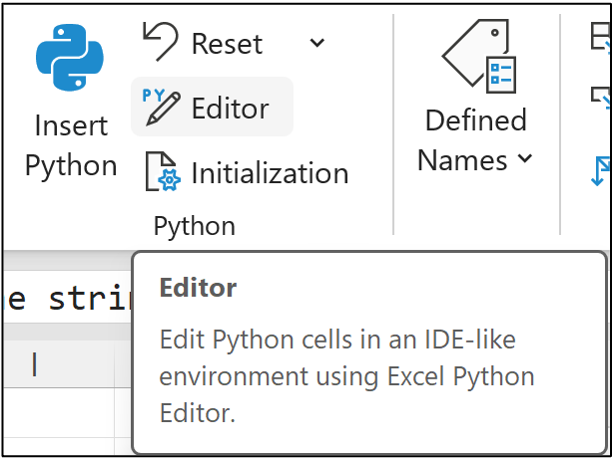
If you want to follow along (highly recommended), fire up Microsoft Excel and access Python in Excel using the new Python Editor by navigating to Formulas in the Ribbon:
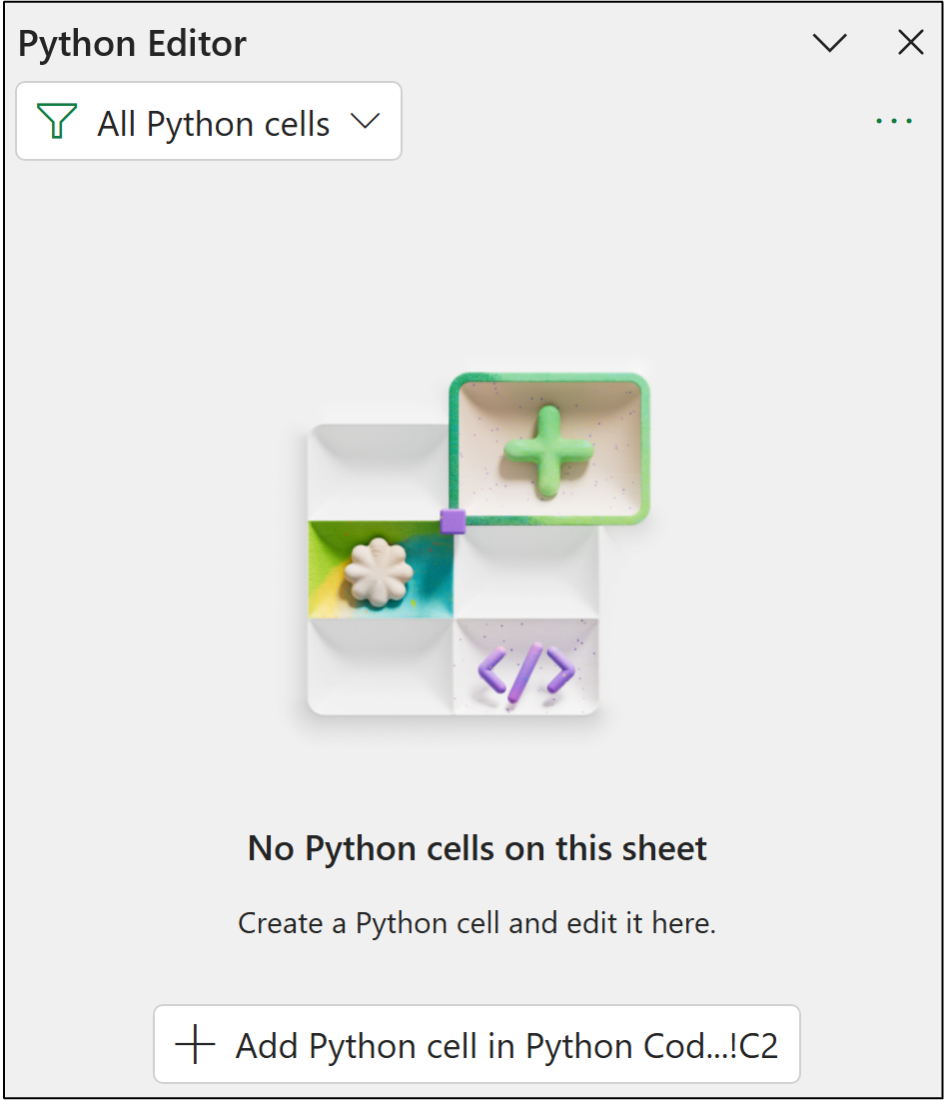
In response, the Python Editor pane will be displayed:
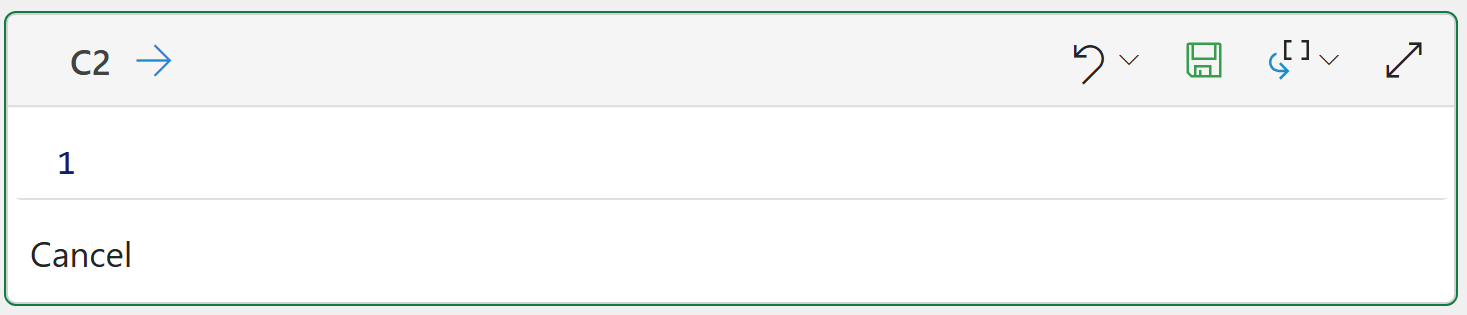
I typically store my Python in Excel code in a worksheet called Python Code. Within this worksheet, I typically arrange all my Python formulas in a single column, starting with cell C2.
Clicking the Add Python cell in... button changes cell C2 to Python mode, where you can use the Python Editor to write your code:
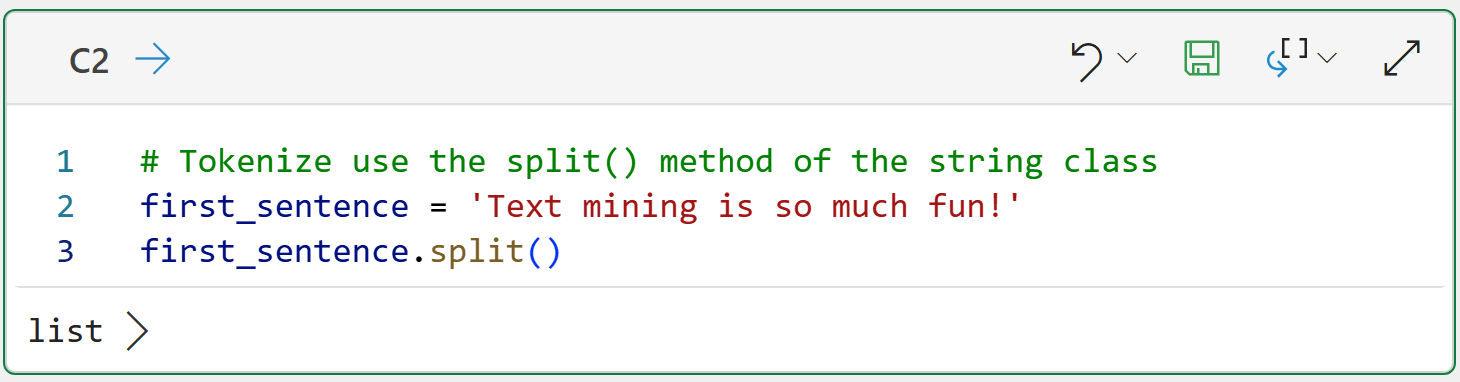
The following Python formula demonstrates the simplest tokenization use case by using the functionality provided by Python's string class:
If you’re new to Python, my Python in Excel Accelerator online course will teach you the fundamentals you need for analytics in a weekend.
And the code for your Excel workbook:
# Tokenize use the split() method of the string class
first_sentence = 'Text mining is so much fun!'
first_sentence.split()
The split() method does what you would expect - it splits the data into pieces (i.e., tokens) by using spaces to separate each token.
Clicking on list > shows the results returned:

While the output above looks good on the surface, it exposes one of the subtle difficulties of proper tokenization - handling punctuation.
In this case, the last token (i.e., fun!) combines two pieces of information:
The word fun conveys a specific meaning in the text (i.e., that text mining is enjoyable).
The exclamation mark (i.e., !) conveys emphasis regarding the enjoyment of text mining (e.g., a comparison to using a period instead).
Here’s another example:
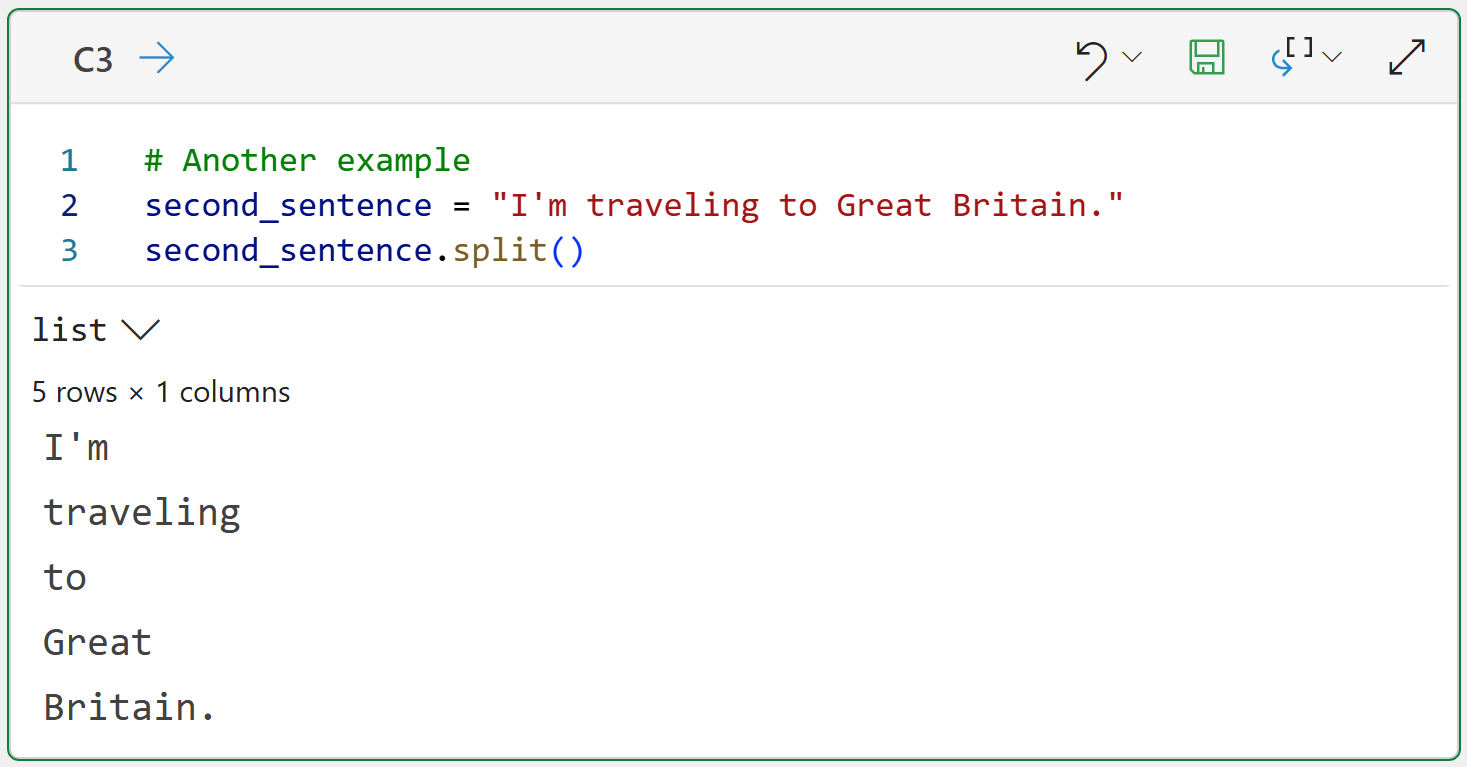
# Another example
second_sentence = "I'm traveling to Great Britain."
second_sentence.split()
The code above demonstrates a couple more tokenization problems that need to be addressed:
The token I’m is the contraction of I am. Ideally, this would be two tokens, not one.
The proper noun Great Britain has been split into two tokens when it should be one.
I will be addressing the first issue in this tutorial series. The second issue is known as named entity recognition (NER). The NLTK offers NER support, but it is beyond the scope of this tutorial.
So, putting this all together, simply splitting on spaces is not enough. You need smarter tokenization.
Enter the mighty NLTK.
Basic Tokenization With the NLTK
Given the importance of tokenization, it should come as no surprise that the NLTK provides out-of-the-box support for smarter tokenization through its tokenizers.
I just love it when names make sense.
Tokenizers perform tokenization on free-form text and produce tokens. Woohoo! The simplest NLTK tokenizer is word_tokenize():
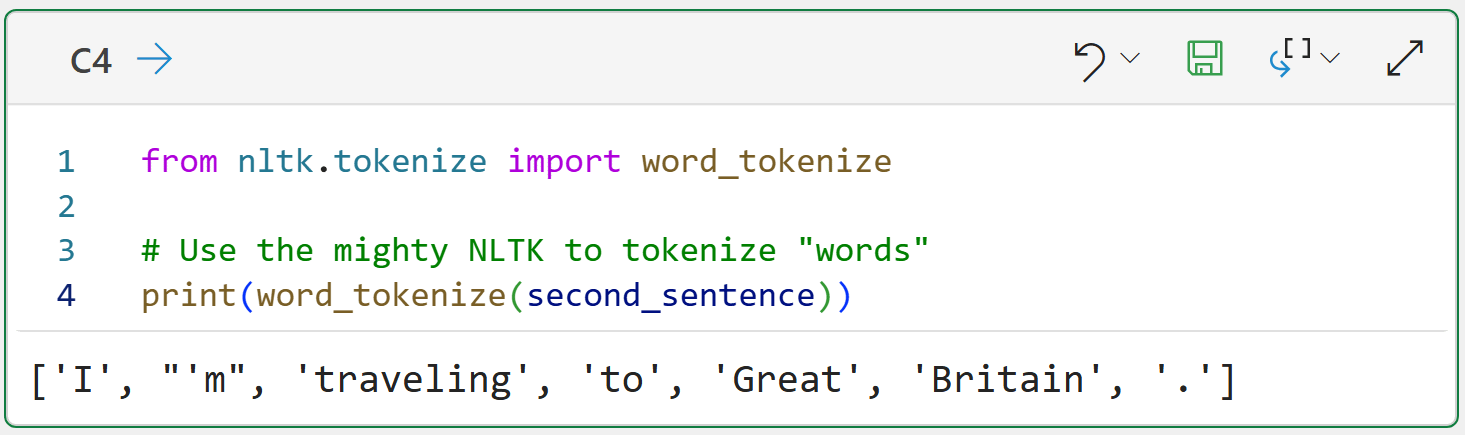
from nltk.tokenize import word_tokenize

# Use the mighty NLTK to tokenize "words"
print(word_tokenize(second_sentence))
As shown in the output above, word_tokenize() is a big improvement from just splitting on spaces:
It recognizes I’m and splits it into two tokens (i.e., ‘I’ and “’m”).
It recognizes punctuation (i.e., the period) and creates a dedicated token.
There’s a problem here, though. Most free-form text is more than just a single sentence.
Sentence Tokenization
Consider the following example of where the free-form text consists of two sentences. You could apply the NLTK's word_tokenize() function to the data:
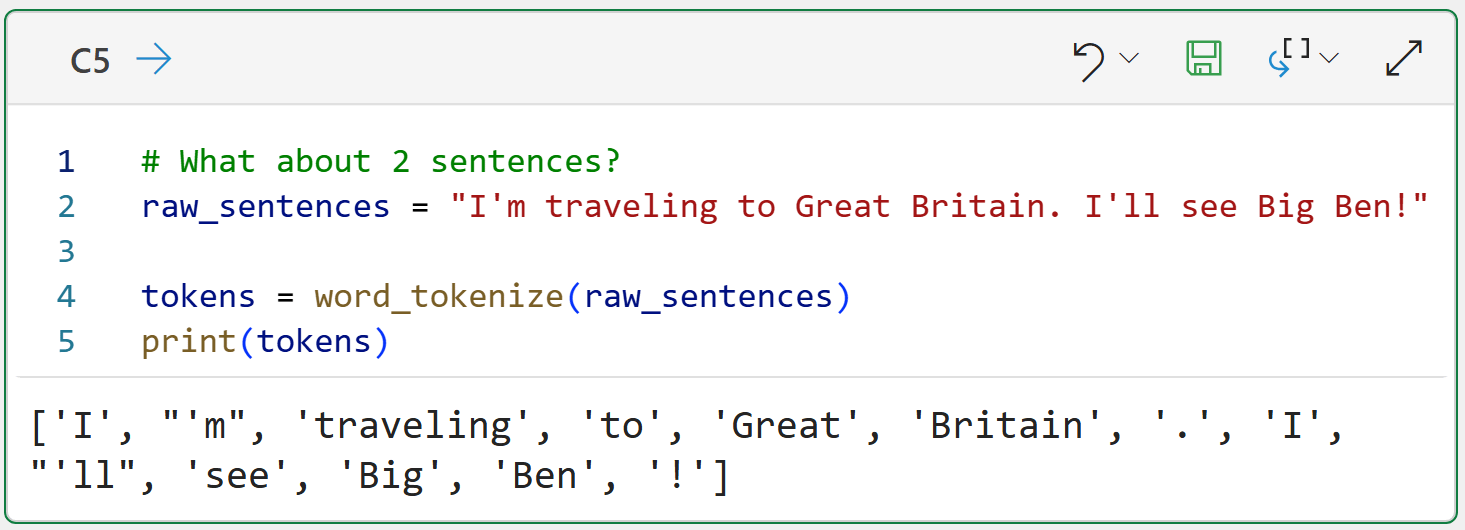
# What about 2 sentences?
raw_sentences = "I'm traveling to Great Britain. I'll see Big Ben!"

tokens = word_tokenize(raw_sentences)
print(tokens)
While there’s a lot to like in the above output (e.g., contractions and punctuation), there’s one show-stopper problem.
The output doesn’t recognize sentence boundaries. It’s just one big list of all the tokens.
As you might have guessed, the NLTK has a tokenizer to handle sentences, sent_tokenize():

from nltk.tokenize import sent_tokenize

# Tokenize sentences first
sentences = sent_tokenize(raw_sentences)
print(sentences)
The output above shows a common pattern when working with the NLTK - you will be working with Python lists a lot. In this case, sent_tokenize() returns a list of strings. Each string corresponds to a sentence.
Another way to think about this is that the tokenizers break free-form text into smaller pieces:
sent_tokenize() breaks free-form text into tokens that are full sentences.
word_tokenize() breaks free-form sentences into word tokens.
From this perspective, tokenizers are building blocks you use to build your text pre-processing pipeline. Here’s an example of taking a document composed of two sentences and tokenizing into individual word tokens:
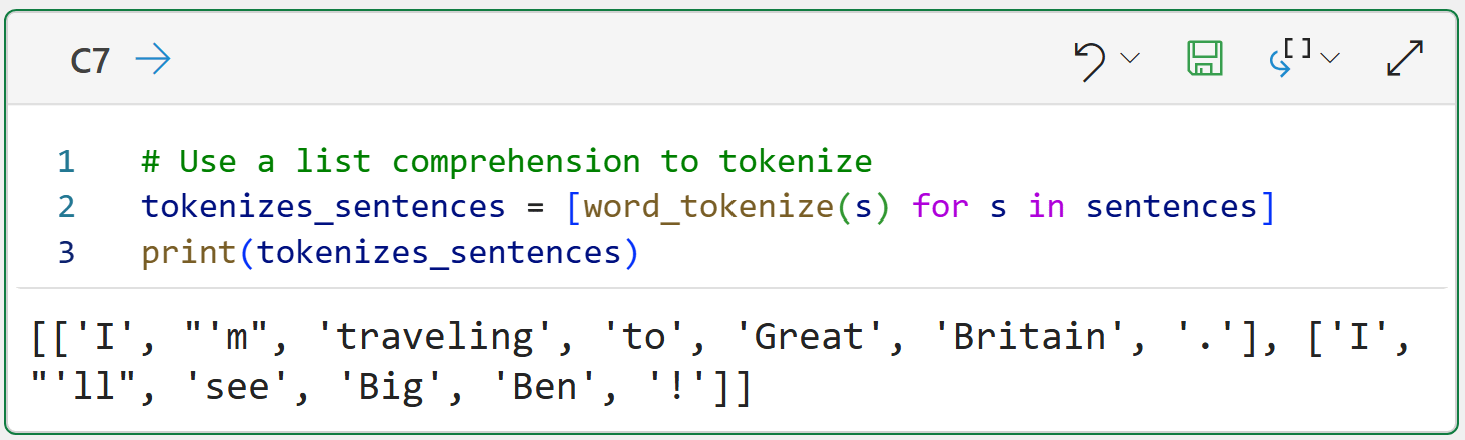
# Use a list comprehension to tokenize
tokenizes_sentences = [word_tokenize(s) for s in sentences]
print(tokenizes_sentences)
The above Python formula demonstrates a simple text pre-processing pipeline:
The code in cell C6 tokenizes the document into a list of strings named sentences.
The code in cell C7 iterates through each sentence and uses word_tokenize() on each sentence.
The tokenized sentences are returned as a list (i.e., sentences) of lists (i.e., sentence tokens).
The magic behind steps 2 and 3 is a Python list comprehension. When mining text data using the NLTK, you write a lot of list comprehensions. So, let’s consider what’s going on in line 2 of the code in cell C7 at a conceptual level:
The sentences variable is an object containing two strings.
The in sentences tells the list comprehension to look at each string one at a time.
The for s tells the list comprehension to name each string s.
The word_tokenize(s) tokenizes each sentence into words.
The list comprehension gathers the output from all the calls to work_tokenize(s) into a list and returns it.
Future tutorials in this series will extend this text pre-processing pipeline.
👉 Ready to learn more? Check out Part 2 here.
That’s it for this tutorial.
My next tutorial in this series will cover the next stage of the text pre-processing pipeline - token normalization.
Stay healthy and happy data sleuthing!
👩🏫 Ready to Learn More Analytics Skills?
My paid subscribers have access to exclusive monthly live crash courses that include:
PDFs of all slides.
Excel workbooks, code, and data.
Recordings so you can learn on your schedule.
Here are some examples of my live crash courses:


David, this question comes from a place of curiosity and learning, and I do not mean it to sound like a jerk. If AI can do a lot of this processing on its own, what advantage does going with your own python workflows gives us? I know one argument is over reliance on AI and not understanding what it is doing is dangerous.
Are there other reasons where this process would be advantageous over an AI workflow handling the tokenization and analysis? Compute cost?? Speed?
This is really awesome stuff. My dilemma is allocation of my time when there's so much going on right now. Thanks again, and I hope it was okay to ask this.